
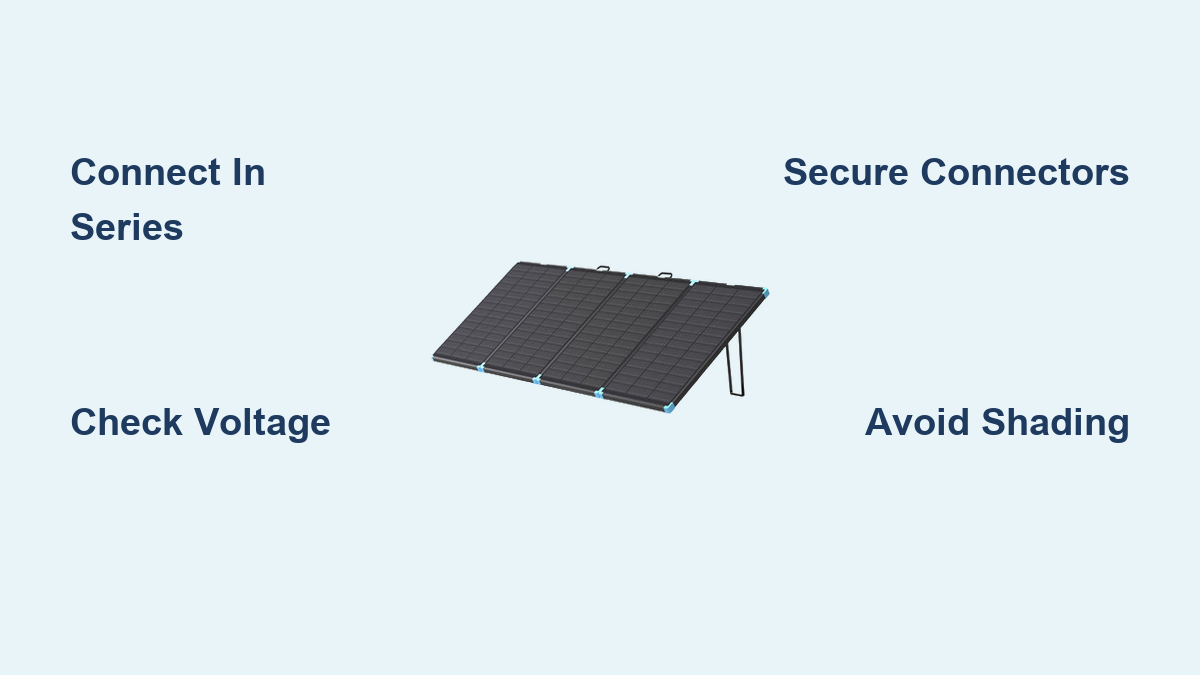
Are you looking to maximize the voltage output of your Renogy solar panel system? Connecting panels in series is a great way to achieve this, but it can be confusing if you’re unsure of the correct process. A simple mistake can damage your equipment or reduce efficiency. This guide will walk you through connecting Renogy solar panels in series, providing a safe and effective solution to boost your system’s power.
This comprehensive guide will go beyond just the wiring diagram. We’ll cover safety precautions, necessary equipment, step-by-step instructions, troubleshooting common issues, and how to determine if series connection is right for your specific setup. By the end of this article, you’ll confidently be able to connect your Renogy solar panels in series and harness the full potential of your solar energy system.
Understanding Series Connections
Before diving into the how-to, let’s understand why you might connect panels in series. When panels are connected in series, the voltages add up while the amperage remains the same. This is useful when you need a higher voltage to match the input requirements of your charge controller or inverter. For example, if you have two 12V panels connected in series, you’ll get a 24V output.
Why Choose Series Connection?
- Higher Voltage: Ideal for systems requiring 24V, 48V, or higher.
- Reduced Wire Gauge: Lower amperage means you can often use thinner (and cheaper) wiring.
- Longer Distance Compatibility: Higher voltage reduces voltage drop over longer cable runs.
Limitations of Series Connection
- Shading Issues: If one panel is shaded, the entire string’s output is severely reduced.
- Panel Compatibility: All panels in a series string must have similar voltage and amperage ratings.
Materials and Tools Needed

| Item | Quantity | Specifications |
|---|---|---|
| Renogy Solar Panels | As Needed | Compatible Voltage/Amperage |
| MC4 Connectors (Male & Female) | Sufficient for all connections | Renogy Compatible |
| MC4 Crimping Tool | 1 | For secure connections |
| Solar Cable (12 AWG or 10 AWG) | Length varies based on distance | UV Resistant |
| Wire Strippers | 1 | For preparing cable ends |
| Multimeter | 1 | For testing voltage and polarity |
| Wrench Set | 1 | For securing mounting hardware |
| Safety Glasses | 1 | Essential for eye protection |
| Gloves | 1 pair | Insulated for electrical safety |
Step-by-Step Series Connection Process
Phase 1: Preparation & Safety
- Safety First: Disconnect any existing solar connections. Work in dry conditions and wear safety glasses and insulated gloves. Never work on a system connected to a load.
- Panel Placement: Arrange the Renogy panels in the desired location and orientation. Ensure they are securely mounted.
- Cable Preparation: Measure and cut the solar cable to the appropriate length to connect the panels. Strip approximately 1/2 inch of insulation from both ends of each cable.
Phase 2: Connecting the Panels
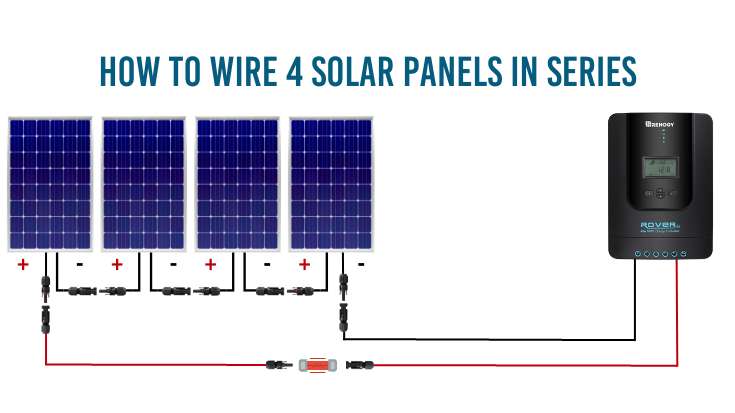
- First Panel (Positive to Negative): Take the first panel. Connect a male MC4 connector to the positive (+) output of the first panel. Connect a female MC4 connector to the negative (-) output of the first panel.
- Second Panel (Positive to Negative): Take the second panel. Connect a male MC4 connector to the positive (+) input of the second panel. Connect a female MC4 connector to the negative (-) input of the second panel.
- Connecting the String: Connect the female MC4 connector from the first panel’s negative output to the male MC4 connector on the second panel’s positive input. This creates the series connection.
- Repeat for Additional Panels: Repeat steps 2 and 3 for each additional panel you want to add to the series string. Always connect positive to negative.
- Final Connection: After connecting all panels, you’ll have a positive (+) output from the last panel and a negative (-) output from the first panel. These are the outputs for your series string.
Phase 3: Testing and Verification
- Polarity Check: Use a multimeter to verify the polarity of the final connection. The positive terminal should read positive, and the negative terminal should read negative.
- Voltage Measurement: Measure the open-circuit voltage (Voc) of the entire string in full sunlight. The Voc should be the sum of the individual panel Vocs. Example: Three 12V panels with a Voc of 20V each should produce a total Voc of 60V.
- Secure Connections: Double-check all MC4 connections to ensure they are securely crimped and locked.
Pro Tips for Renogy Series Connections
- Use High-Quality MC4 Connectors: Cheap connectors can corrode and cause performance issues. Invest in Renogy-compatible, high-quality MC4 connectors.
- Proper Crimping is Crucial: A poorly crimped MC4 connector can create resistance and potentially overheat. Use a dedicated MC4 crimping tool and ensure a solid crimp.
- Consider Panel Mismatch: While ideally all panels should be identical, slight differences can occur. Using bypass diodes within the panels (most Renogy panels have these) can minimize the impact of shading or mismatch.
- Cable Management: Neatly organize and secure the cables to prevent damage and tripping hazards.
- Monitor String Voltage: Regularly monitor the voltage of the series string to detect any issues early on.
When to Call a Professional
- Complex System Design: If you’re designing a large or complex solar system, consulting with a qualified solar installer is recommended.
- Roof Work: If the installation involves working on a roof, it’s best to hire professionals for safety reasons.
- Electrical Concerns: If you’re uncomfortable working with electrical wiring, don’t hesitate to call a professional electrician.
FAQ
Q: Can I mix different wattage Renogy panels in series?
A: While technically possible, it’s not recommended. Different wattage panels will have different current ratings, and the lowest current panel will limit the output of the entire string.
Q: What if one panel in the series string is shaded?
A: Shading significantly reduces the output of the entire string. Bypass diodes in the panels help mitigate this, but significant shading will still impact performance. Consider using microinverters or DC optimizers for shaded installations.
Q: What gauge wire should I use for series connections?
A: 12 AWG or 10 AWG solar cable is generally recommended, depending on the length of the run and the current. Consult a wire gauge chart to determine the appropriate size for your specific application.
Q: How many panels can I connect in series?
A: The maximum number of panels depends on your charge controller’s input voltage limit. Ensure the total voltage of the series string does not exceed this limit.
Enjoy Your Optimized Solar System!
By following these steps, you’ve successfully connected your Renogy solar panels in series, boosting your system’s voltage and maximizing its potential.
– You’ve learned the principles of series connections.
– You’ve mastered the step-by-step process for connecting Renogy panels.
– You understand the safety precautions and troubleshooting techniques.
Now, you can confidently enjoy the benefits of a more efficient and powerful solar energy system!
Share your experience in the comments below! Did you encounter any challenges during the process? Let us know, and we’ll be happy to help.