

Are you frustrated because your Renogy battery isn’t charging, leaving you without power when you need it most? A non-charging battery can disrupt off-grid living, camping trips, or emergency power setups. The good news is a simple reset or check of your connections can often get things back on track quickly.
This comprehensive guide will walk you through a variety of solutions to diagnose and fix your Renogy battery charging issues. We’ll cover everything from basic troubleshooting steps to more advanced problem-solving, ensuring you can confidently restore power to your system and prevent future headaches. By the end of this article, you’ll be equipped to tackle almost any charging problem your Renogy battery throws your way.
Common Causes of Renogy Battery Not Charging
Several factors can contribute to a Renogy battery failing to charge. Here’s a breakdown of the most frequent culprits:
Incorrect Wiring
Improperly connected wires are a leading cause. Reversed polarity, loose connections, or incorrect wire gauge can all prevent charging.
Faulty Charge Controller
The charge controller is the heart of your charging system. A malfunctioning controller won’t effectively transfer power to the battery.
Damaged Cables & Connectors
Corroded, frayed, or broken cables and connectors disrupt the flow of electricity.
Battery Issues
The battery itself could be the problem. This includes sulfation, internal shorts, or simply reaching the end of its lifespan.
Insufficient Sunlight (Solar Systems)
If you’re using solar panels, cloudy weather or inadequate sunlight exposure can limit charging.
Low Voltage Protection
Some Renogy batteries and charge controllers have low voltage protection features that can halt charging if the battery is deeply discharged.
How to Fix Renogy Battery Not Charging
Here are several methods to troubleshoot and resolve your Renogy battery charging issues, starting with the simplest solutions.
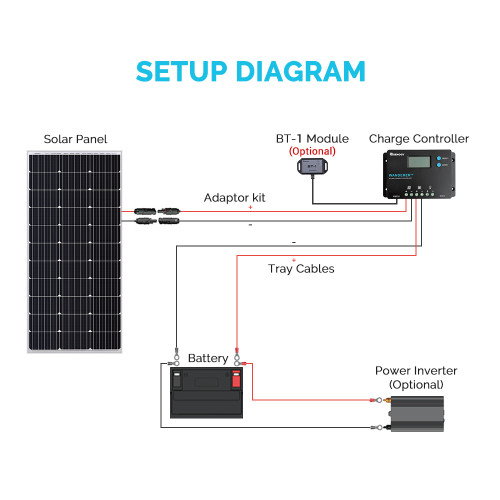
Method 1: Quick Connection Check
This is the first thing to try, and often resolves the issue.
Diagnosing the Issue
Visually inspect all wiring connections between the solar panel (if applicable), charge controller, and battery. Look for loose wires, corrosion, or damage.
Fix Steps
- Turn off all power to the system.
- Tighten all connections: Ensure all terminals are securely fastened.
- Clean connections: Use a wire brush or sandpaper to remove any corrosion from the terminals.
- Check polarity: Confirm that positive (+) and negative (-) terminals are correctly connected at all points.
- Reconnect and test: Turn the power back on and check if the battery is charging.
Testing
Use a multimeter to measure the voltage at the battery terminals. You should see a voltage increase if the battery is charging.
Method 2: Resetting the Charge Controller
Sometimes a simple reset can resolve software glitches.
Diagnosing the Issue
If the charge controller has a display, check for error messages. If not, a reset is a safe first step.
Fix Steps
- Disconnect the load and solar panel (if applicable) from the charge controller.
- Disconnect the battery from the charge controller.
- Wait 60 seconds. This allows the controller to fully discharge.
- Reconnect the battery.
- Reconnect the solar panel (if applicable).
- Reconnect the load.
- Observe: Check the charge controller display for any error messages or charging indication.
Testing
Monitor the battery voltage over time to see if it’s increasing, indicating charging.
Method 3: Inspecting and Replacing Cables
Damaged cables can impede charging.
Diagnosing the Issue
Visually examine the cables for any cuts, fraying, or kinks. Use a multimeter to check for continuity – a broken cable will show no continuity.
Fix Steps
- Disconnect the cables from the system.
- Inspect the entire length of each cable.
- Replace damaged cables: Use cables of the correct gauge (AWG) for the amperage of your system. Refer to the Renogy documentation for recommended cable sizes.
- Secure connections: Ensure proper crimping or soldering of connectors.
Testing
After replacing cables, re-connect the system and monitor the battery voltage to confirm charging.
Method 4: Battery Health Check
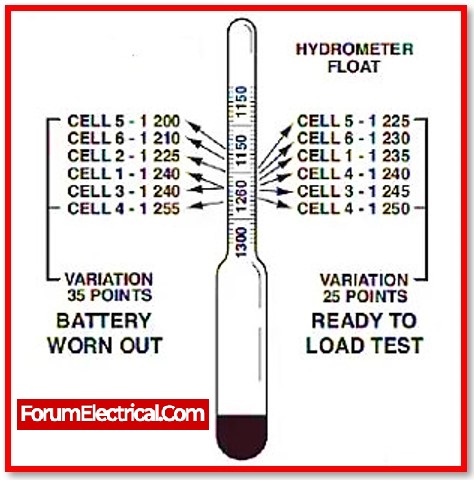
If the above steps don’t work, the battery itself might be the problem.
Diagnosing the Issue
Use a battery hydrometer to check the specific gravity of each cell (for flooded lead-acid batteries). A low specific gravity indicates a weak or sulfated cell. For lithium batteries, a multimeter can check the battery’s internal resistance.
Fix Steps
- Test each cell (if applicable).
- Desulfate (for flooded lead-acid batteries): Use a desulfator to attempt to restore sulfated cells.
- Equalize (for flooded lead-acid batteries): Perform an equalization charge to balance the cells. Consult your battery’s manual for equalization procedures.
- Replace the battery: If the battery is severely damaged or nearing the end of its lifespan, replacement is necessary.
Testing
After desulfation or equalization, re-test the battery’s voltage and specific gravity to see if performance has improved.
Preventing Future Charging Issues
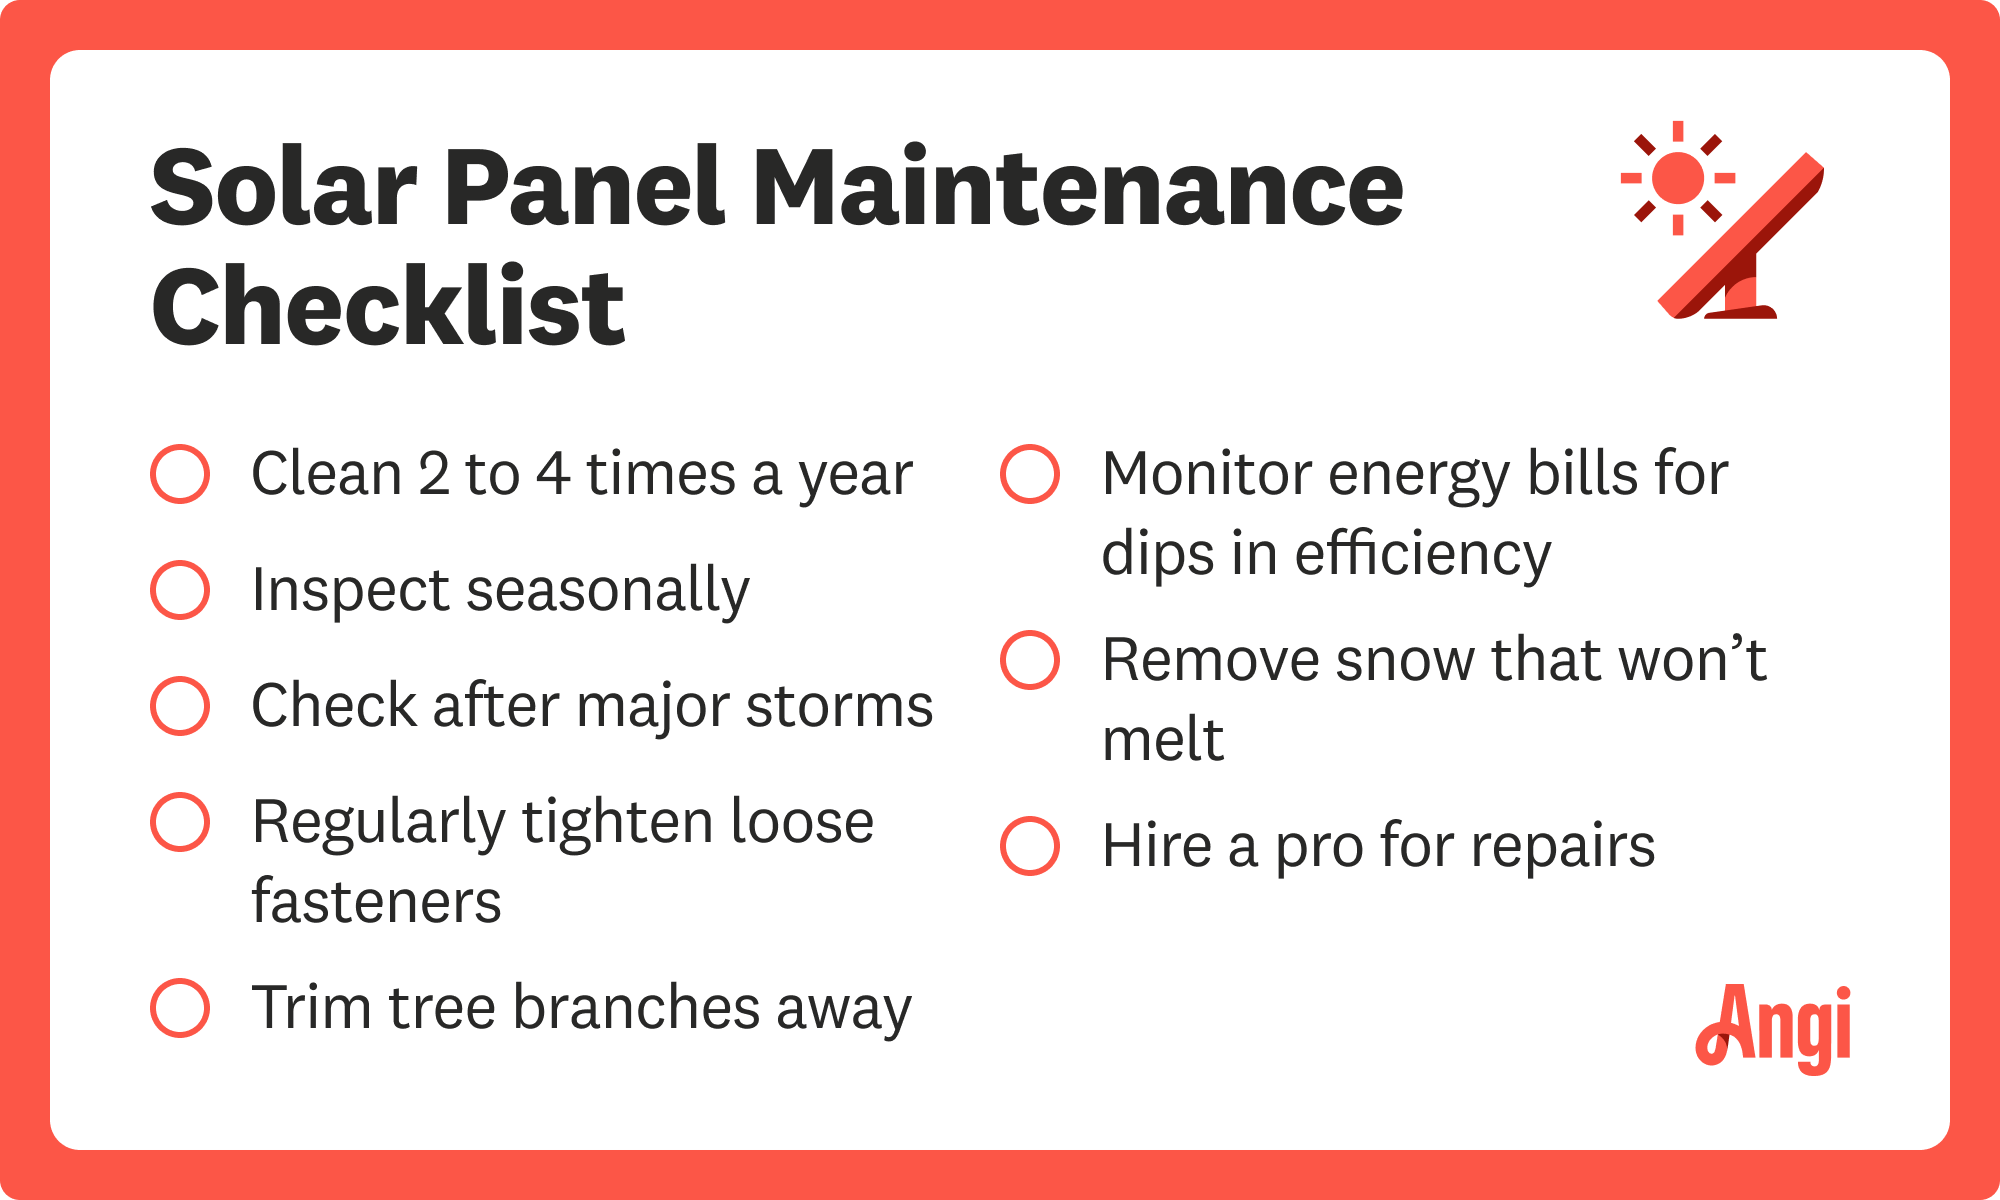
Proactive maintenance can prevent many charging problems.
Regular Inspection
Inspect all wiring, connections, and cables monthly for signs of damage or corrosion.
Cleanliness
Keep the battery terminals and connections clean.
Proper Ventilation
Ensure adequate ventilation around the battery to prevent buildup of explosive gases (for flooded lead-acid batteries).
Avoid Deep Discharges
Minimize deep discharges, as they can shorten battery lifespan.
Monitor Battery Voltage
Regularly monitor the battery voltage to identify potential problems early.
Pro Tips
- Use a Battery Monitor: A battery monitor provides detailed information about battery voltage, current, state of charge, and other vital parameters.
- Correct Wire Gauge: Using the correct wire gauge is crucial for efficient charging and preventing overheating.
- Fuse Protection: Always use fuses to protect your system from short circuits.
- Charge Controller Settings: Familiarize yourself with your charge controller’s settings and adjust them according to your battery type.
- Temperature Compensation: Many charge controllers offer temperature compensation, which adjusts the charging voltage based on ambient temperature.
Professional Help
If you’ve tried these troubleshooting steps and your Renogy battery still isn’t charging, it’s time to consult a professional. Signs you need professional help include:
- Damage to the charge controller
- Internal battery damage
- Difficulty interpreting error codes
- Recurring charging issues
A qualified solar installer or electrician can diagnose the problem and recommend the appropriate solution. Typical costs for a professional diagnosis range from $75-$150. Repair costs vary depending on the extent of the damage.
FAQ
Q: Why is my Renogy battery showing 12.6V but not charging?
A: The battery may be fully charged and reaching its float voltage. It could also indicate a problem with the charge controller not recognizing the battery’s state of charge.
Q: How do I know if my Renogy charge controller is bad?
A: Check for error messages on the display, no charging indication, or unusual behavior. Use a multimeter to verify the controller is outputting the correct voltage.
Q: Can I use a car battery charger on my Renogy battery?
A: Yes, but only if the charger is compatible with the battery type (lead-acid or lithium). Always follow the charger’s instructions.
Alternative Solutions
If your charge controller is failing, consider upgrading to a more advanced model with features like MPPT (Maximum Power Point Tracking) for increased efficiency. Alternatively, you could consider a different brand of charge controller known for reliability, such as Victron Energy or Morningstar.
| Solution | Pros | Cons | Best For |
|---|---|---|---|
| MPPT Charge Controller | Increased efficiency, better performance in low light | Higher cost | Larger solar systems, maximizing energy harvest |
| Victron Energy/Morningstar Controller | High reliability, advanced features | Higher cost | Critical applications, demanding environments |
Get Your Renogy Battery Working Again
You now have a comprehensive toolkit to diagnose and fix your Renogy battery charging problems! Remember to start with the simple checks – connections and resets – and then move to more advanced troubleshooting steps. Don’t hesitate to seek professional help if you’re unsure or uncomfortable with any aspect of the process.
Have you successfully fixed your Renogy battery? Share your experience in the comments below to help other readers! What troubleshooting step worked for you?