
Are you frustrated trying to figure out if you need to buy additional breakers to use your Jackery Transfer Station? It’s a common question, and the short answer is no, breakers are not included with the Jackery Transfer Station. However, understanding which breakers you need and how to install them is crucial for safe and effective operation.
This comprehensive guide will detail everything you need to know about breakers and the Jackery Transfer Station. We’ll cover compatible breaker types, amperage requirements, installation considerations, and where to source the necessary components to get your home backup system up and running smoothly. By the end of this article, you’ll have the knowledge to confidently outfit your Transfer Station for reliable power during outages.
Understanding Breakers and the Jackery Transfer Station
The Jackery Transfer Station isn’t a generator itself; it’s a smart power panel designed to safely distribute power from a Jackery power station (like the Explorer 2000 Plus or Explorer 1500 Pro) to hardwired circuits in your home. Unlike a traditional generator, it doesn’t generate electricity – it manages it. This means it relies on your existing electrical panel and requires appropriate circuit breakers to protect those circuits.
Why Breakers Are Essential
Breakers are safety devices. They protect your wiring and appliances from overloads and short circuits. Without them, you risk damaging your electrical system, causing fires, or damaging your connected devices. The Transfer Station itself doesn’t provide this protection; it requires breakers to be installed in your existing electrical panel.
Jackery Transfer Station Specifications & Breaker Requirements

The Jackery Transfer Station is typically rated for a maximum continuous output of 3000W. The number of circuits you can power depends on the wattage of each appliance or device. Here’s a breakdown of key considerations:
- Voltage: The Transfer Station operates on 120V/240V, depending on the model and configuration.
- Amperage: The total amperage draw across all connected circuits must not exceed the Transfer Station’s capacity.
- Circuit Count: The standard Transfer Station supports up to 6 circuits.
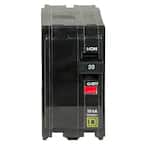
- Breaker Type: Specifically, QoV2 type breakers are required for compatibility with the Jackery Transfer Station. These are often referred to as “slimline” or “thin” breakers. Standard breakers will not fit.
Choosing the Right Breakers

Selecting the correct breakers is paramount. Using the wrong type or amperage can compromise safety and functionality.
QoV2 Breakers: The Required Type
QoV2 breakers are designed for use with newer electrical panels that utilize a thinner profile. They are essential for the Jackery Transfer Station because of the panel’s design.
Determining Amperage
The amperage of each breaker should match the circuit’s wiring capacity. Common residential circuit amperages include:
- 15 Amps: Lighting, standard outlets
- 20 Amps: Kitchen outlets, bathroom outlets, some appliances
- 30 Amps: Dryer, water heater, air conditioner (depending on the model)
Important: Never install a breaker with a higher amperage than the wiring is rated for. Check the wire gauge and consult an electrician if you’re unsure.
Sizing for Multiple Circuits
When planning your Transfer Station setup, calculate the total wattage you intend to run simultaneously. Divide that wattage by 120V (or 240V if you’re using 240V circuits) to determine the required amperage. Ensure your breakers and wiring can handle this load.
Installing Breakers in Your Electrical Panel
Warning: Working with electrical systems can be dangerous. If you are not comfortable with electrical work, hire a qualified electrician.
Safety First
- Turn off the main breaker: Before starting any work, completely shut off the power to your electrical panel.
- Use insulated tools: Protect yourself from electric shock.
- Test for power: Before touching any wires, use a non-contact voltage tester to confirm the power is off.
Installation Steps
- Identify Available Spaces: Locate empty breaker slots in your electrical panel that are compatible with QoV2 breakers.
- Remove Panel Cover: Carefully remove the cover of your electrical panel.
- Install Breaker: Snap the QoV2 breaker into the designated slot. Ensure it’s securely seated.
- Connect Wiring: Connect the appropriate wires to the breaker terminals. Typically, black (hot) wire to the upper terminal, white (neutral) wire to the neutral bus bar, and green or bare copper (ground) wire to the ground bus bar.
- Repeat for Each Circuit: Repeat steps 3 and 4 for each circuit you want to connect to the Transfer Station.
- Reinstall Panel Cover: Carefully reinstall the panel cover.
- Turn on Main Breaker: Restore power to the electrical panel.
Sourcing Breakers and Other Components
Where to Buy QoV2 Breakers
- Home Improvement Stores: Lowe’s, Home Depot, and other major retailers often carry QoV2 breakers.
- Electrical Supply Houses: These stores specialize in electrical components and may offer a wider selection.
- Online Retailers: Amazon and other online retailers sell QoV2 breakers, but ensure you’re purchasing from a reputable seller.
Additional Components
- Wire Connectors: For making secure connections between wires.
- Wire: To extend existing circuits if needed.
- Electrical Tape: For insulating connections.
- Non-Contact Voltage Tester: For verifying power is off.
Pro Tips for a Smooth Installation
- Plan Your Circuit Layout: Carefully consider which appliances and devices you want to power with the Transfer Station and assign them to specific circuits accordingly.
- Label Your Breakers: Clearly label each breaker to indicate which circuit it controls.
- Consult an Electrician: If you’re unsure about any aspect of the installation, don’t hesitate to consult a qualified electrician.
- Check Local Codes: Ensure your installation complies with all local electrical codes and regulations.
Professional Help: When to Call an Electrician
- You are uncomfortable working with electricity.
- Your electrical panel is old or outdated.
- You need to upgrade your wiring.
- You are unsure about local electrical codes.
- You encounter any problems during installation.
FAQ
Q: Can I use standard breakers with the Jackery Transfer Station?
A: No. The Jackery Transfer Station requires QoV2 (slimline) breakers due to the panel’s design. Standard breakers will not fit and could pose a safety hazard.
Q: What amperage breaker should I use for a refrigerator?
A: Most refrigerators require a 15-amp breaker. However, check the appliance’s nameplate for specific requirements.
Q: Can I connect a generator to the Jackery Transfer Station?
A: No. The Transfer Station is designed to work with Jackery power stations, not generators.
Q: How many circuits can I run simultaneously?
A: The number of circuits you can run depends on the total wattage draw of all connected appliances and the Transfer Station’s 3000W capacity.
Alternative Solutions
If you’re hesitant about installing breakers yourself, consider a whole-house transfer switch installed by a professional electrician. These switches are more expensive but offer a more streamlined and comprehensive backup power solution.
Get Your Jackery Transfer Station Up and Running
You now know that breakers don’t come with the Jackery Transfer Station, but you also have the knowledge to select, install, and safely utilize the correct ones. Remember to prioritize safety, follow instructions carefully, and consult a qualified electrician when needed.
Have you successfully installed your breakers and connected your Jackery Transfer Station? Share your experience and any helpful tips in the comments below!