
Are you excited about harnessing the power of the sun with your EcoFlow Delta 2, but feeling overwhelmed by the setup process? It’s common to feel unsure about connecting solar panels, ensuring compatibility, and maximizing your energy harvest. The good news is getting your EcoFlow Delta 2 working with solar panels is often a straightforward process, and we’ll cover the quickest connection method right away.
This comprehensive guide will walk you through everything you need to know about setting up your EcoFlow Delta 2 with solar panels, from understanding compatibility and required accessories to a detailed, step-by-step installation process. We’ll cover troubleshooting common issues, optimizing your setup for peak performance, and even explore pro tips to get the most out of your solar investment. By the end of this article, you’ll have the confidence to power your life sustainably with the sun!
What You’ll Need for EcoFlow Delta 2 Solar Panel Setup
| Item | Quantity | Specifications |
|---|---|---|
| EcoFlow Delta 2 | 1 | Portable Power Station |
| Solar Panels | 1-4 | 110W-400W per panel (See Compatibility Below) |
| EcoFlow Solar Panel Connector (MC4 to XT60) | 1 per panel | Required if panels don’t have XT60 connectors |
| Parallel Connection Hub (Optional) | 1 | For connecting multiple panels in parallel |
| Extension Cables (Optional) | As needed | To reach desired panel location |
| Wrench/Screwdriver | 1 | For securing connections (if needed) |
| Multimeter (Optional) | 1 | For testing voltage and current |
Compatibility is Key: The EcoFlow Delta 2 accepts solar input between 11-100V and a maximum of 500W. EcoFlow recommends their own panels, but many third-party panels will work. Ensure your panel’s open circuit voltage (Voc) is within the 11-100V range and the maximum power (Wattage) doesn’t exceed 500W. Connecting too many panels or panels with incorrect voltage can damage the Delta 2.
Understanding Solar Panel Connections: Series vs. Parallel
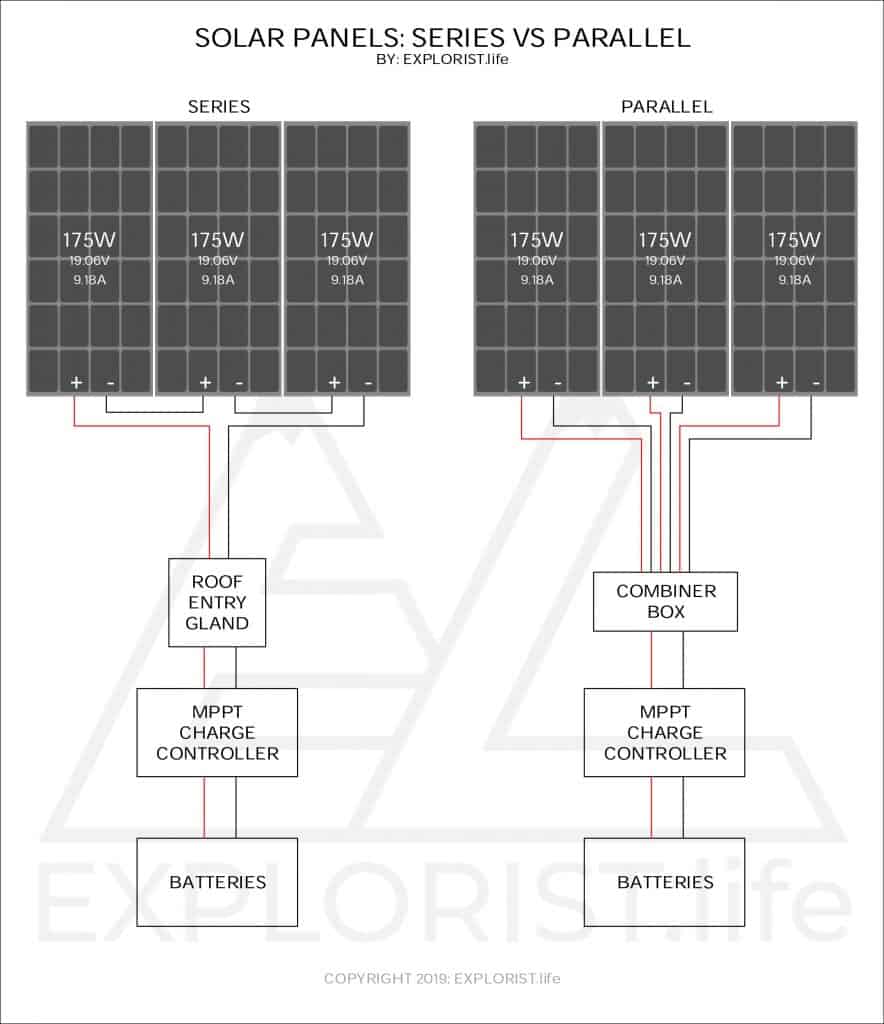
Before diving into the setup, it’s important to understand the two main ways to connect solar panels:
- Series Connection: Increases voltage while keeping current the same. This is generally not recommended for the Delta 2, as it’s easy to exceed the 100V input limit.
- Parallel Connection: Increases current while keeping voltage the same. This is the preferred method for the Delta 2, as it allows you to add more power without exceeding voltage limits. You’ll need a parallel connection hub for this.
Step-by-Step Solar Panel Setup Process
Phase 1: Preparation
- Safety First: Work in a dry environment. Avoid setting up during rain or wet conditions.
- Panel Placement: Position your solar panels in a location that receives maximum sunlight throughout the day. South-facing is usually optimal in the Northern Hemisphere. Angle the panels towards the sun for best results.
- Connector Check: Inspect your solar panels’ connectors. Most EcoFlow panels use XT60 connectors, which plug directly into the Delta 2. If your panels have MC4 connectors (the most common type), you’ll need an MC4 to XT60 adapter cable for each panel.
- Cable Management: Plan your cable routing to avoid tripping hazards and ensure a clean setup.
Phase 2: Connecting the Solar Panel(s)
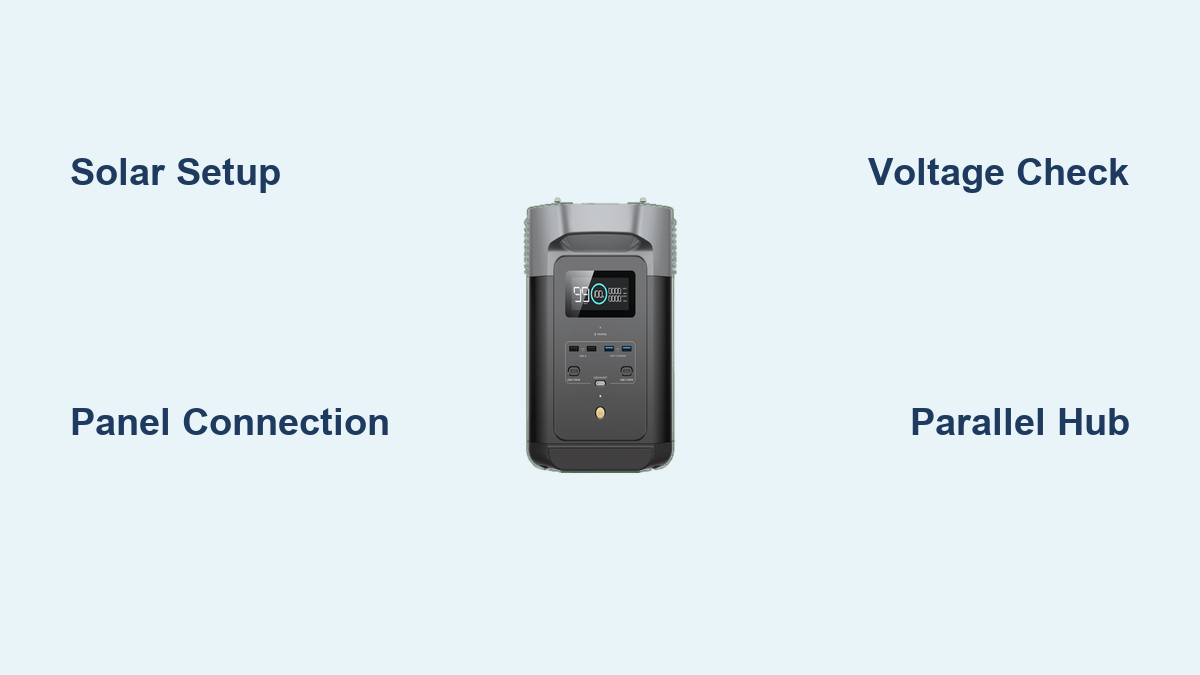
- Single Panel Connection (Simplest): If you have a single panel with an XT60 connector, simply plug it directly into the solar input port on the Delta 2. The port is clearly marked with a sun icon.
- Multiple Panels with XT60 Connectors (Parallel): Connect a parallel connection hub to the Delta 2’s solar input port. Then, connect each solar panel’s XT60 connector to a separate port on the parallel connection hub.
- Using MC4 to XT60 Adapters: If your panels have MC4 connectors, attach the MC4 to XT60 adapter cable to each panel. Then, follow the instructions for connecting multiple panels with XT60 connectors (using a parallel hub).
- Secure Connections: Ensure all connections are firmly seated. A loose connection can interrupt power flow and potentially damage the system.
Phase 3: Powering On and Monitoring
- Power On Delta 2: Turn on your EcoFlow Delta 2.
- Check the Display: The Delta 2’s display will show the solar input wattage. This indicates how much power the panels are currently generating.
- Monitor Charging: Observe the charging percentage on the Delta 2’s display. It should increase as the panels generate power.
- EcoFlow App: Connect your Delta 2 to the EcoFlow app via Wi-Fi or Bluetooth. The app provides detailed information about solar input, battery status, and charging history.
Troubleshooting Common Issues

- No Solar Input:
- Check Connections: Ensure all connectors are secure.
- Panel Placement: Confirm panels are in direct sunlight.
- Voltage Check: Use a multimeter to verify the panel’s voltage output. It should be within the Delta 2’s acceptable range (11-100V).
- Cable Issues: Inspect cables for damage.
- Low Solar Input:
- Shading: Ensure panels are not shaded by trees, buildings, or other objects.
- Panel Angle: Adjust the panel angle to optimize sunlight exposure.
- Panel Cleanliness: Clean the panel surface to remove dirt and debris.
- Delta 2 Not Charging:
- Overload Protection: The Delta 2 might have triggered overload protection. Try disconnecting and reconnecting the panels.
- Software Glitch: Restart the Delta 2 to resolve potential software issues.
Pro Tips for Optimizing Your EcoFlow Delta 2 Solar Setup

- Maximize Sunlight: Regularly adjust panel angles throughout the day to track the sun’s movement.
- Parallel Connections are Best: Always connect panels in parallel to stay within the Delta 2’s voltage limit.
- Invest in Quality Cables: Use durable, weather-resistant cables to ensure long-term reliability.
- Monitor Performance: Use the EcoFlow app to track solar input and identify potential issues.
- Clean Regularly: Keep your panels clean for optimal efficiency. Dust, dirt, and bird droppings can significantly reduce power output.
- Consider a Smart Solar Tracker: For maximum energy harvest, explore solar panel trackers that automatically adjust to the sun’s position.
Professional Help Section
- When to Call a Pro: If you’re uncomfortable working with electrical connections, suspect a faulty panel, or are experiencing persistent charging issues, it’s best to consult a qualified solar installer.
- Finding a Service Provider: Look for installers with experience with EcoFlow products.
- Typical Costs: Professional installation costs vary depending on the complexity of the setup and your location. Expect to pay between $100 – $500 for a basic setup.
FAQ Section
Q: Can I use different brands of solar panels with my EcoFlow Delta 2?
A: Yes, as long as the panels meet the Delta 2’s voltage and wattage requirements (11-100V, max 500W).
Q: What does the parallel connection hub do?
A: It allows you to connect multiple solar panels in parallel, increasing the total current while maintaining a safe voltage level for the Delta 2.
Q: How do I know if my solar panels are compatible?
A: Check the panel’s specifications for open circuit voltage (Voc) and maximum power (Wattage). Compare these values to the Delta 2’s specifications.
Q: Can I charge the Delta 2 with both solar and AC power at the same time?
A: Yes, the Delta 2 can accept both solar and AC charging simultaneously.
Alternative Solutions Section
| Solution | Pros | Cons | Best For |
|---|---|---|---|
| EcoFlow Solar Panels | Guaranteed compatibility, easy setup | More expensive | Users prioritizing simplicity |
| Third-Party Panels | More affordable, wider selection | Requires careful compatibility check | Budget-conscious users |
Enjoy Your New Solar Power System!
You’ve successfully set up your EcoFlow Delta 2 with solar panels! Now you can enjoy clean, sustainable energy whenever the sun is shining.
Here’s what we covered:
– Essential components and compatibility considerations
– A detailed step-by-step setup process
– Troubleshooting common issues
– Pro tips for maximizing performance
Don’t hesitate to experiment with different panel positions and configurations to find what works best for your location. With a little planning and effort, you can harness the power of the sun and reduce your reliance on the grid.
Share your EcoFlow Delta 2 solar setup in the comments below! What panels are you using, and what challenges did you encounter?