
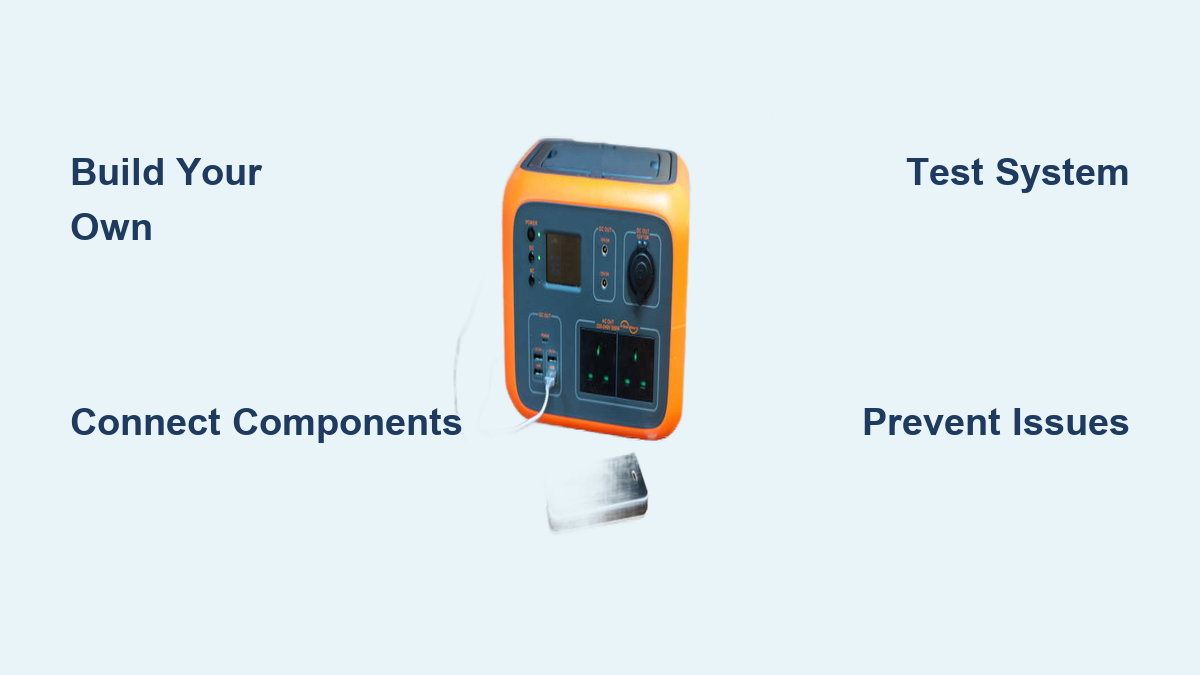
Running out of power during an outage is frustrating, and relying solely on the grid can be limiting. Building your own solar generator offers a reliable, portable, and sustainable power solution. This guide will walk you through the process, from selecting components to final assembly, giving you the freedom to power your devices anywhere, anytime. We’ll start with a quick overview of the essential parts and then dive into a step-by-step build.
This comprehensive guide will cover everything you need to know to build a solar generator tailored to your needs. Beyond the basic build, we’ll explore different component options, safety considerations, troubleshooting, and ways to expand your system’s capacity. By the end of this article, you’ll have the knowledge and confidence to create a dependable power source for emergencies, camping, or off-grid living.
What You’ll Need for Solar Generator Construction
| Item | Quantity | Specifications |
|---|---|---|
| 12V Deep Cycle Battery | 1 or more | 100Ah Lithium Iron Phosphate (LiFePO4) recommended for longevity |
| Solar Panel | 1 or more | 100W-300W, 12V output |
| Charge Controller | 1 | MPPT (Maximum Power Point Tracking) recommended for efficiency, 10A-30A depending on panel wattage |
| Inverter | 1 | Pure Sine Wave, wattage based on your needs (e.g., 300W, 600W, 1000W) |
| Battery Cables | As needed | 4 AWG or thicker, with ring terminals |
| Fuses & Fuse Holders | As needed | Appropriate amperage for battery and inverter protection |
| Enclosure | 1 | Durable plastic or metal case to house components |
| Voltmeter/Ammeter | Optional | For monitoring system performance |
| Anderson Powerpoles | Optional | For quick and easy connections |
| Wiring Connectors | As needed | For secure connections |
Preparing for Your Solar Generator Build
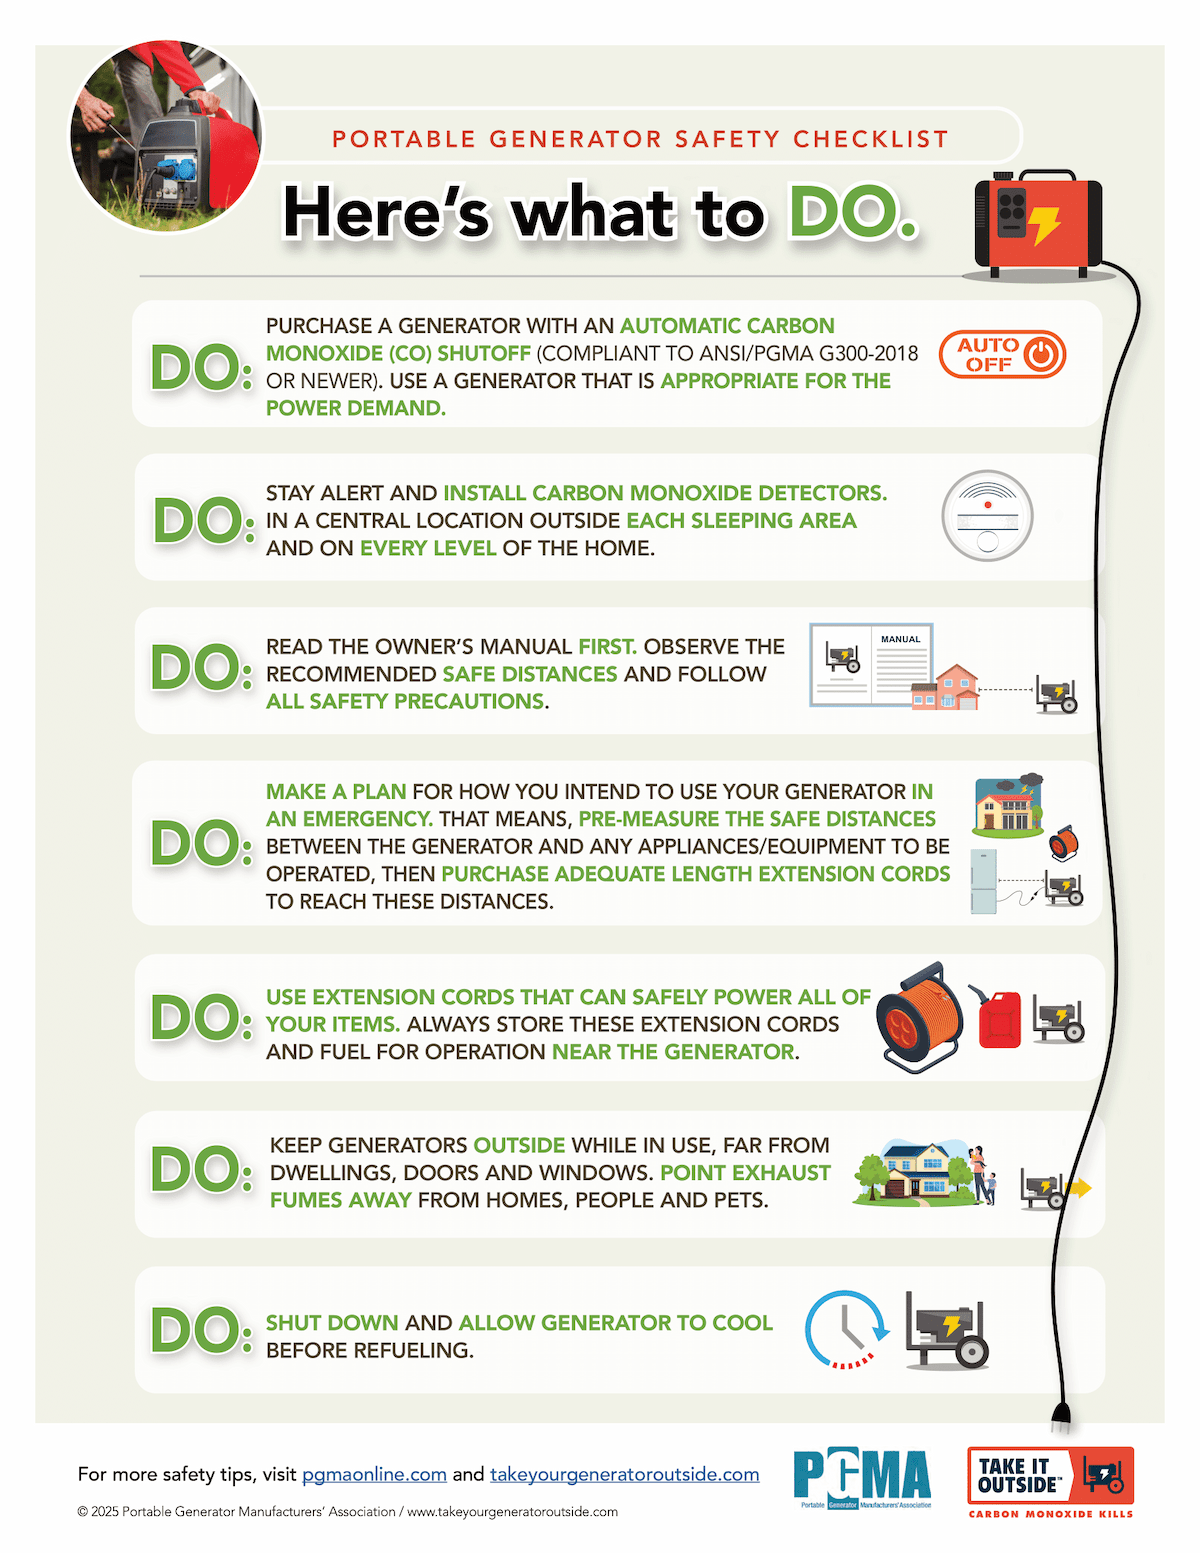
Safety is paramount when working with electricity and batteries. Before you begin, take these precautions:
- Disconnect Power: Ensure all components are disconnected from any power source before starting.
- Ventilation: Work in a well-ventilated area, especially when dealing with batteries.
- Eye Protection: Wear safety glasses to protect your eyes from debris.
- Gloves: Use insulated gloves when handling electrical connections.
- Battery Safety: Lithium batteries require specific charging protocols. Ensure your charge controller is compatible.
- Fuse Protection: Always use appropriately sized fuses to protect against overcurrent.
Step-by-Step Solar Generator Build Process
Phase 1: Enclosure Preparation
- Choose an Enclosure: Select a sturdy enclosure large enough to comfortably house all components, allowing for airflow.
- Drill Ventilation Holes: Drill ventilation holes in the enclosure to prevent overheating. Consider using a small fan for additional cooling.
- Mount Components: Plan the layout and mount the components securely inside the enclosure. Use screws, bolts, or adhesive mounting tape.
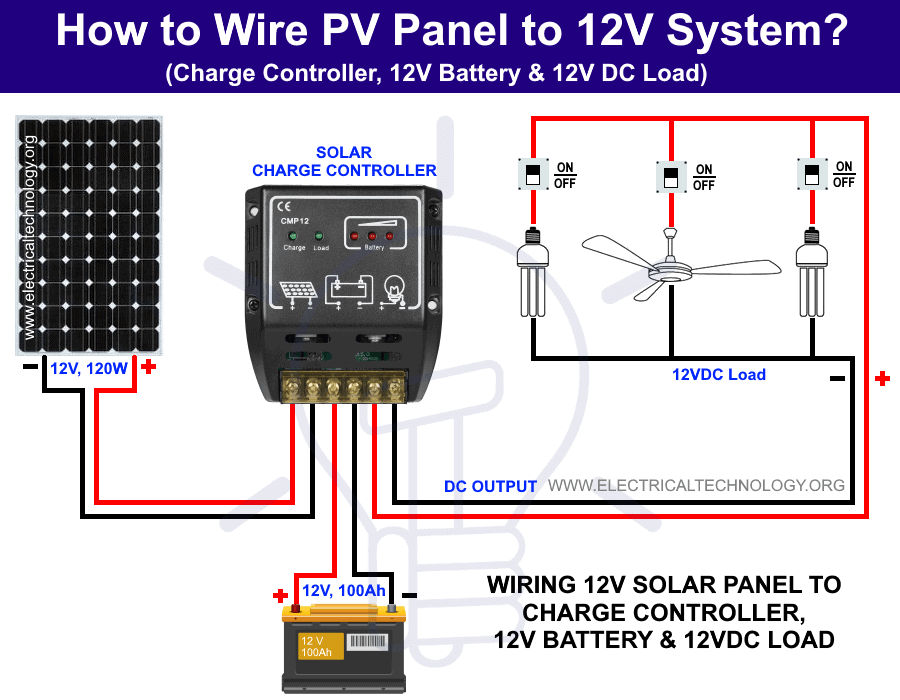
Phase 2: Wiring the System
- Connect Solar Panel to Charge Controller: Connect the positive (+) and negative (-) wires from the solar panel to the corresponding terminals on the charge controller.
- Connect Battery to Charge Controller: Connect the battery’s positive (+) and negative (-) terminals to the battery terminals on the charge controller. Important: Connect the battery after the solar panel.
- Connect Battery to Inverter: Connect the battery’s positive (+) and negative (-) terminals to the corresponding terminals on the inverter using appropriately sized battery cables and fuses. Important: Use a fuse as close to the battery as possible.
- Grounding (Optional): Ground the enclosure to a suitable earth ground for added safety.
Phase 3: System Testing & Configuration
- Initial Power-Up: With everything connected, turn on the charge controller and inverter.
- Voltage Check: Use a voltmeter to verify the battery voltage and ensure the charge controller is functioning correctly.
- Load Test: Connect a small load (e.g., a light bulb) to the inverter to test the system’s output.
- Charge Controller Settings: Configure the charge controller settings according to your battery type (LiFePO4, AGM, Gel). Refer to the charge controller’s manual for instructions.
- Monitor Performance: Monitor the system’s performance over time to ensure it’s charging and discharging efficiently.
Ways to Prevent Future System Issues
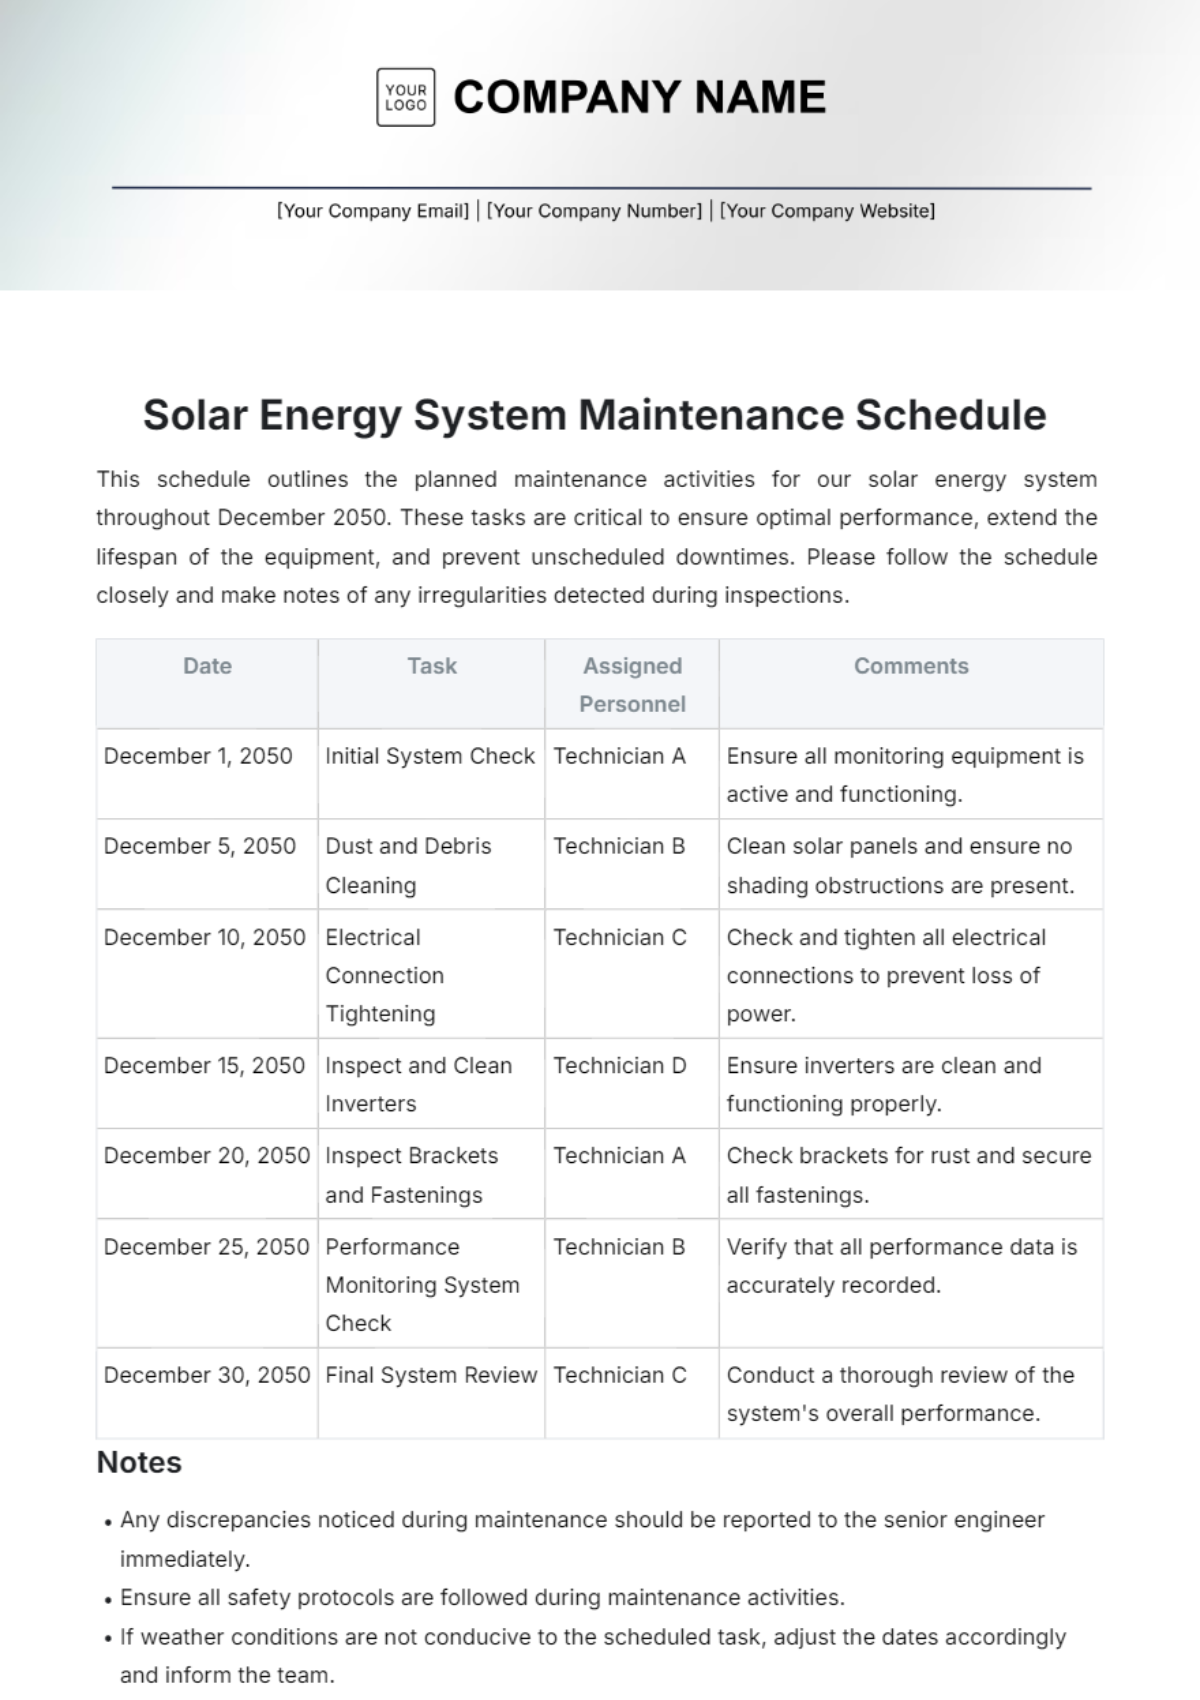
- Regular Inspection: Inspect all connections and wiring regularly for corrosion or damage.
- Battery Maintenance: Follow the manufacturer’s recommendations for battery maintenance (e.g., equalization charging for lead-acid batteries).
- Clean Solar Panels: Keep the solar panels clean to maximize energy capture. Wipe them down with a soft cloth and water.
- Proper Storage: When storing the solar generator for extended periods, disconnect the battery and store it in a cool, dry place.
- Avoid Overloading: Do not exceed the inverter’s wattage capacity.
Pro Tips for Building a Superior Solar Generator
- LiFePO4 Batteries: Invest in Lithium Iron Phosphate (LiFePO4) batteries. They offer superior lifespan, efficiency, and safety compared to lead-acid batteries, despite the higher upfront cost.
- MPPT Charge Controller: Use an MPPT (Maximum Power Point Tracking) charge controller. It maximizes energy harvest from the solar panel, especially in less-than-ideal conditions.
- Pure Sine Wave Inverter: Choose a pure sine wave inverter for sensitive electronics. Modified sine wave inverters can damage some devices.
- Anderson Powerpoles: Use Anderson Powerpoles for quick and easy connections and disconnections.
- Battery Monitoring System: Consider adding a battery monitoring system (BMMS) for detailed insights into battery health and performance.
- Expandability: Design your system with future expansion in mind. Choose components that can handle additional solar panels or batteries.
- Cable Management: Use cable ties and organizers to keep the wiring neat and tidy inside the enclosure.
When to Call a Professional
- Complex Wiring: If you’re uncomfortable with electrical wiring, consult a qualified electrician.
- Battery Issues: If you suspect a battery is faulty or damaged, have it inspected by a professional.
- System Malfunctions: If you encounter persistent problems that you can’t troubleshoot, seek help from a solar power specialist.
FAQ Section
Q: How much power can a solar generator provide?
A: The power output depends on the battery capacity, inverter wattage, and solar panel size. A typical system can provide anywhere from a few hundred watts to several kilowatts of power.
Q: How long will it take to charge the battery?
A: Charging time depends on the solar panel wattage, sunlight conditions, and battery capacity. A 100W solar panel can typically charge a 100Ah battery in 10-15 hours of full sunlight.
Q: Can I charge the solar generator from a wall outlet?
A: Yes, some charge controllers have an AC input that allows you to charge the battery from a wall outlet.
Q: What size inverter do I need?
A: Calculate the total wattage of the devices you plan to power simultaneously and choose an inverter with a slightly higher wattage capacity.
Q: Is a solar generator environmentally friendly?
A: Yes, solar generators are a clean and sustainable power source that reduces reliance on fossil fuels.
Get Your Solar Generator Working Again
By following these steps, you’ve successfully built a reliable and sustainable power source. Remember to prioritize safety, choose quality components, and monitor your system’s performance regularly.
Did you build your own solar generator? Share your experience and any tips you learned in the comments below! What devices are you planning to power with your new system?