
Are you frustrated with your Renogy Rover charge controller displaying errors, not charging your batteries, or behaving erratically? A simple reset can often resolve these issues and get your solar power system back online. This guide will walk you through various reset methods for your Renogy Rover, starting with the quickest fixes and progressing to more comprehensive solutions.
This comprehensive guide provides more than just a quick reset button location. We’ll cover identifying when a reset is needed, different reset procedures for various scenarios, troubleshooting common errors, and preventative maintenance to avoid future issues. By the end of this article, you’ll be confident in your ability to diagnose and resolve most problems with your Renogy Rover charge controller.
Understanding When a Reset is Necessary
Before diving into the reset procedures, it’s important to understand why a reset might be needed. Common reasons include:
- Error Codes: The controller displays an error code indicating a system fault.
- Battery Not Charging: The batteries aren’t receiving a charge despite sufficient sunlight and proper connections.
- Incorrect Settings: Modified settings have led to unexpected behavior.
- Controller Freezing: The display is unresponsive or frozen.
- System Instability: The controller is behaving erratically or shutting down unexpectedly.
Reset Methods for Renogy Rover Charge Controllers

Method 1: Basic Power Cycle (Quickest Fix)
This is the simplest reset method, often resolving minor glitches.
Diagnosing the Issue: Use this method first if the controller is displaying a minor error or seems unresponsive.
Fix Steps:
- Disconnect Loads: Turn off or unplug all devices connected to the load terminals.
- Disconnect Solar Panels: Disconnect the solar panels from the controller. Important: Cover the panels to avoid accidental voltage.
- Disconnect Battery: Disconnect the battery bank from the controller.
- Wait 60 Seconds: Allow the controller to completely discharge.
- Reconnect Battery: Reconnect the battery bank.
- Reconnect Solar Panels: Reconnect the solar panels.
- Reconnect Loads: Turn on or plug in your devices.
Testing: Monitor the controller’s display to see if the error has cleared and the battery is charging.
Method 2: Resetting to Factory Defaults
This method restores the controller to its original factory settings. Warning: This will erase all custom settings, including battery type, charging profiles, and voltage settings. You will need to reconfigure these settings.
Diagnosing the Issue: Use this method if the controller is severely malfunctioning, has corrupted settings, or you want to start with a clean slate.
Fix Steps:
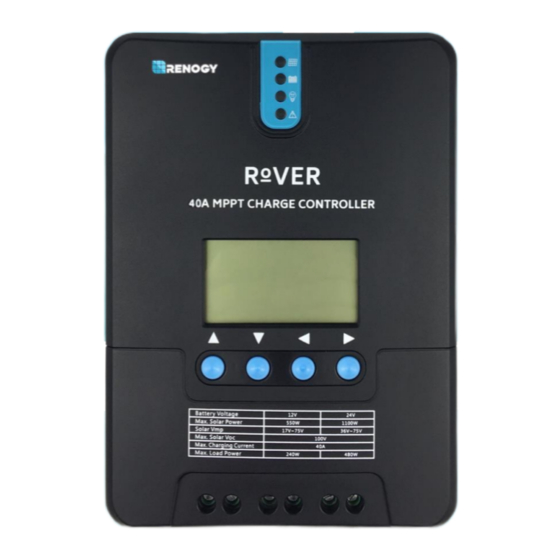
- Access Settings Menu: Navigate to the “Settings” menu on the Renogy Rover display. (The exact navigation may vary slightly depending on your model; consult your user manual).
- Find Reset Option: Look for a “Reset,” “Factory Reset,” or “Defaults” option within the settings.
- Confirm Reset: The controller will likely ask for confirmation. Select “Yes” or “Confirm.”
- Controller Restart: The controller will restart and return to its factory default settings.
Testing: Verify the controller is functioning and then reconfigure your desired settings.
Method 3: Using the Reset Button (If Equipped)
Some Renogy Rover models have a dedicated reset button, typically a small recessed button.
Diagnosing the Issue: Use this method if the display is completely frozen or unresponsive and you cannot access the settings menu.
Fix Steps:
- Locate Reset Button: Refer to your user manual to find the location of the reset button. It’s often on the side or back of the controller.
- Press and Hold: Use a small, non-conductive tool (like a paperclip) to press and hold the reset button for 5-10 seconds.
- Release Button: Release the button and allow the controller to restart.
Testing: Monitor the controller’s display for proper operation.
Preventing Future Reset Needs & Maintenance
Regular maintenance can prevent the need for frequent resets:
- Keep Connections Clean: Regularly inspect and clean all connections (solar panels, batteries, loads) to ensure good conductivity.
- Protect from Moisture: Ensure the controller is protected from rain, snow, and excessive humidity.
- Proper Ventilation: Provide adequate ventilation around the controller to prevent overheating.
- Monitor Battery Voltage: Regularly monitor your battery bank’s voltage and state of charge.
- Firmware Updates: Check the Renogy website for firmware updates that may improve performance and stability.
Pro Tips for Renogy Rover Charge Controllers
- Document Your Settings: Before performing a factory reset, take photos of your settings for easy reconfiguration.
- Use Correct Wire Gauge: Ensure you are using the correct wire gauge for the distance between the solar panels, controller, and batteries to minimize voltage drop.
- Check Polarity: Double-check the polarity (positive and negative) of all connections before powering up the system. Reversed polarity can damage the controller.
- Avoid Overloading: Do not exceed the controller’s maximum current or voltage ratings.
- Regularly Inspect Cables: Look for any signs of damage or wear on the cables.
Professional Help
If you’ve tried all the reset methods and are still experiencing issues, it may be time to consult a professional.
Signs You Need Professional Help:
- Physical Damage: The controller is physically damaged (e.g., cracked casing, burnt components).
- Persistent Errors: Error codes continue to reappear after resetting.
- Unusual Noises: The controller is making unusual noises (e.g., buzzing, clicking).
- Safety Concerns: You suspect a safety hazard (e.g., overheating, sparking).
What to Look For in a Service Provider:
- Experience: Look for a qualified solar installer or electrician with experience working with Renogy products.
- Certifications: Check for relevant certifications (e.g., NABCEP).
- Warranty: Ensure the service provider offers a warranty on their work.
- Cost: Get quotes from multiple providers to compare pricing.
FAQ
Q: What does error code E01 mean on a Renogy Rover?
A: Error code E01 typically indicates low battery voltage. Check your battery bank’s voltage and ensure it’s within the acceptable range for your controller.
Q: Can I reset my Renogy Rover remotely?
A: No, Renogy Rover charge controllers do not have remote reset capabilities. You must physically access the controller to perform a reset.
Q: Will resetting the controller affect my battery warranty?
A: Resetting the controller itself should not affect your battery warranty. However, improper settings or overloading the controller could void the warranty.
Q: What if the controller won’t turn on after a reset?
A: Ensure the battery is fully charged and properly connected. If the controller still doesn’t turn on, there may be an internal fault, and you should contact Renogy support.
Get Your Renogy Rover Working Again
By following these steps, you should now be able to troubleshoot and reset your Renogy Rover charge controller effectively. Remember to start with the simplest solutions and work your way up to more complex procedures.
Don’t let a malfunctioning charge controller disrupt your solar power setup. Take action today and get back to enjoying clean, reliable energy!
Have you successfully reset your Renogy Rover? Share your experience or any additional tips in the comments below!