
Are you frustrated because your Renogy battery monitor isn’t displaying accurate information, or worse, isn’t working at all? A malfunctioning battery monitor can leave you in the dark about your power system’s health, potentially leading to unexpected shutdowns or battery damage. Fortunately, many issues can be resolved with a few simple checks and adjustments. This guide will walk you through the most common problems and provide step-by-step solutions to get your Renogy battery monitor back online.
This comprehensive guide goes beyond a quick fix. We’ll cover common causes of issues, detailed troubleshooting steps – from basic checks to advanced configurations – and preventative maintenance to ensure reliable performance. By the end of this article, you’ll have the knowledge and confidence to diagnose and resolve most Renogy battery monitor problems, keeping your off-grid or mobile power system running smoothly.
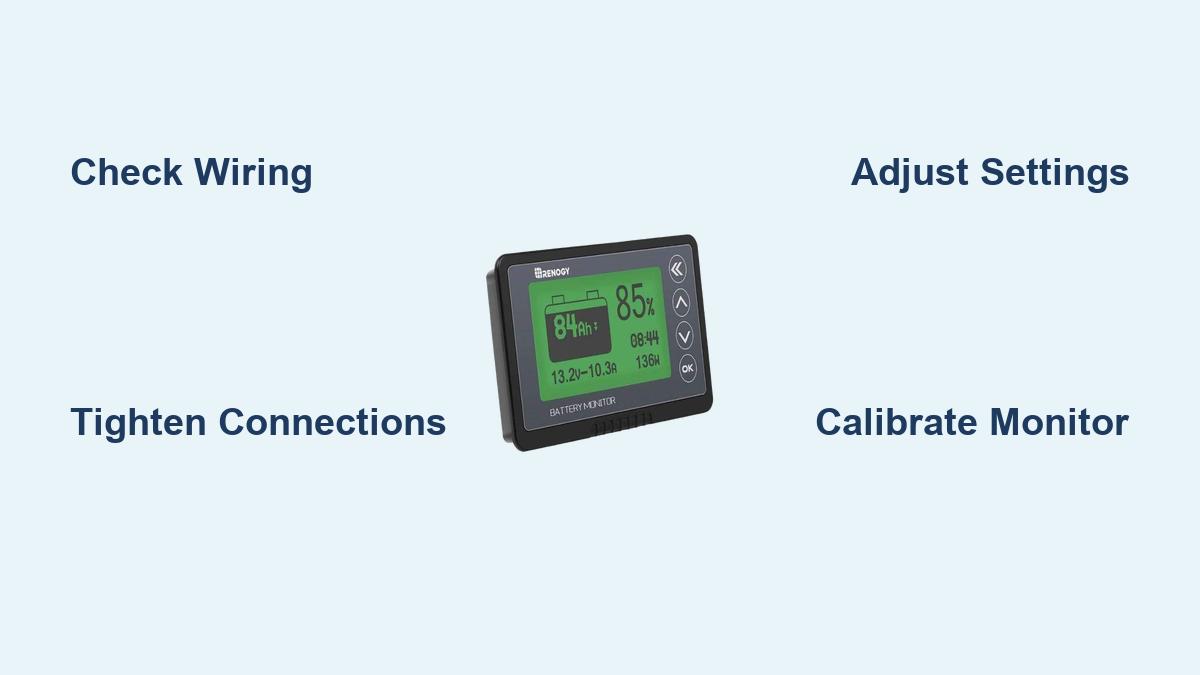
Common Causes of Renogy Battery Monitor Issues
Before diving into solutions, understanding why your monitor might be failing is crucial. Here are some common culprits:
- Loose Connections: The most frequent cause is often a simple loose wire at the monitor, shunt, or battery.
- Incorrect Wiring: Improper wiring, especially with the shunt, can lead to inaccurate readings or complete failure.
- Shunt Issues: The shunt itself can be faulty, damaged, or improperly sized for your system.
- Battery Type Mismatch: Incorrect battery type settings in the monitor’s configuration can result in inaccurate state of charge readings.
- Software/Firmware Bugs: Occasionally, software glitches or outdated firmware can cause issues.
- Voltage Drop: Excessive voltage drop in the wiring between the battery, shunt, and monitor can lead to inaccurate readings.
- Compatibility Issues: While rare, certain Renogy monitor models may have compatibility issues with specific battery chemistries or inverter/charger systems.
How to Fix Renogy Battery Monitor Not Working
Let’s explore various solutions, starting with the simplest and progressing to more complex ones.
Method 1: Basic Checks & Resets (Quick Fix)
This method addresses the most common, easily fixable issues.
Diagnosing the Issue
- Visual Inspection: Carefully examine all wiring connections to the monitor, shunt, and battery. Look for loose wires, corrosion, or damage.
- Power Cycle: Turn off the entire system (inverter, charger, loads) and disconnect the battery briefly. This performs a hard reset.
Fix Steps
- Tighten Connections: Secure all wiring connections. Ensure they are clean and making good contact.
- Reconnect System: Reconnect the battery and power up the system. Observe if the monitor powers on and displays readings.
- Monitor Reset: Refer to your Renogy battery monitor’s manual for instructions on performing a factory reset. This can resolve software glitches.
Testing
Monitor the display for accurate readings. If the problem persists, move to Method 2.
Method 2: Verifying Wiring and Shunt Connection

Incorrect wiring is a common source of problems.
Diagnosing the Issue
- Refer to Manual: Consult the Renogy battery monitor’s manual for the correct wiring diagram for your specific model.
- Trace Wires: Carefully trace each wire from the monitor to the shunt and then to the battery, comparing it to the diagram.
Fix Steps
- Correct Wiring: Correct any wiring errors according to the manual’s diagram. Pay close attention to polarity (+/-).
- Shunt Placement: Ensure the shunt is installed correctly – all negative battery current MUST flow through the shunt.
- Shunt Resistance: Verify the shunt resistance is appropriate for your system’s amperage. An undersized shunt will cause inaccurate readings.
Testing
Power on the system and observe the monitor. Check for accurate voltage, current, and state of charge readings.
Method 3: Battery Type and Configuration Settings

Incorrect settings can lead to inaccurate readings.
Diagnosing the Issue
- Access Settings: Navigate to the settings menu on your Renogy battery monitor.
- Check Battery Type: Confirm the battery type setting matches your actual battery chemistry (e.g., AGM, Gel, Lithium).
Fix Steps
- Adjust Battery Type: Change the battery type setting to match your battery chemistry.
- Adjust Parameters: Configure other relevant parameters, such as battery capacity (Ah), voltage cut-off levels, and charging profiles, according to your battery’s specifications.
- Calibration: Some monitors have a calibration feature. Follow the manual’s instructions to calibrate the monitor for accurate readings.
Testing
Monitor the battery’s state of charge during charging and discharging to ensure accurate readings.
Method 4: Addressing Voltage Drop

Excessive voltage drop can distort readings.
Diagnosing the Issue
- Voltage Measurement: Use a multimeter to measure the voltage at the battery terminals, at the shunt, and at the monitor.
- Compare Readings: Significant voltage differences between these points indicate voltage drop.
Fix Steps
- Upgrade Wiring: Replace undersized wiring with thicker gauge wire to reduce resistance.
- Shorten Wire Runs: Minimize the length of the wiring runs between the battery, shunt, and monitor.
- Secure Connections: Ensure all connections are clean and tight to minimize resistance.
Testing
Remotely check the voltage readings at each point to ensure they are consistent.
Preventing Future Issues & Maintenance
- Regularly Inspect Wiring: Check wiring connections at least every six months for looseness or corrosion.
- Clean Terminals: Keep battery terminals and wiring connections clean and free of corrosion.
- Monitor Firmware: Check for firmware updates from Renogy and install them to address potential bugs.
- Proper Shunt Sizing: Ensure the shunt is appropriately sized for your system’s maximum current draw.
- Protect from Environment: Shield the monitor and shunt from moisture and extreme temperatures.
Pro Tips
- Use Ferrules: When connecting wires to screw terminals, use crimped-on ferrules for a secure and reliable connection.
- Document Your Wiring: Create a detailed wiring diagram of your system for future troubleshooting.
- Consider a Remote Monitor: For larger systems, a remote monitor can provide convenient access to data and alerts.
- Isolate Components: If you suspect a specific component is causing the issue, temporarily disconnect it to isolate the problem.
- Check Grounding: A proper grounding system is crucial for accurate readings and safety.
Professional Help
If you’ve tried these troubleshooting steps and your Renogy battery monitor still isn’t working, it may be time to seek professional help.
- Signs You Need a Pro: Continuous inaccurate readings, monitor failure after attempting repairs, suspected internal component failure.
- Finding a Provider: Look for qualified solar installers or RV technicians experienced with battery monitoring systems.
- Typical Costs: Repair costs can vary widely depending on the issue. Expect to pay $50-$200 for diagnostics and repairs. A full replacement can range from $100 – $500+ depending on the monitor model.
- Warranty: Check your Renogy monitor’s warranty for potential coverage.
FAQ
Q: My Renogy battery monitor shows a negative amperage reading. What’s wrong?
A: This usually indicates reversed polarity on the shunt connection. Double-check that the wires are connected correctly, with the negative battery cable connected to the shunt.
Q: How do I calibrate my Renogy battery monitor?
A: The calibration process varies depending on the model. Refer to your monitor’s manual for specific instructions. Typically, it involves fully charging and discharging the battery while monitoring the readings.
Q: Can I use a Renogy battery monitor with a different brand of battery?
A: Yes, but you must ensure you select the correct battery type setting in the monitor’s configuration.
Q: My shunt seems to be getting hot. Is this normal?
A: A warm shunt is normal during high current draw. However, if it’s excessively hot, it could indicate an undersized shunt or a short circuit. Disconnect the system and investigate.
Get Your Renogy Battery Monitor Working Again
You’ve now learned a comprehensive set of troubleshooting steps to diagnose and resolve common issues with your Renogy battery monitor. Remember to start with the simplest solutions and work your way towards more complex ones. By following these guidelines, you can keep your power system running reliably and efficiently.
Which method successfully resolved your battery monitor issue? Share your experience in the comments below to help other Renogy users!